For coastal homeowners, especially along Florida’s scenic Treasure Coast, the salty air and humid climate are a constant threat to outdoor projects. From a newly built deck to a repainted fence or a custom planter box, metal rusts, wood rots, and paint peels at an accelerated rate. This isn’t just about aesthetics; it’s about preserving your hard work and investment.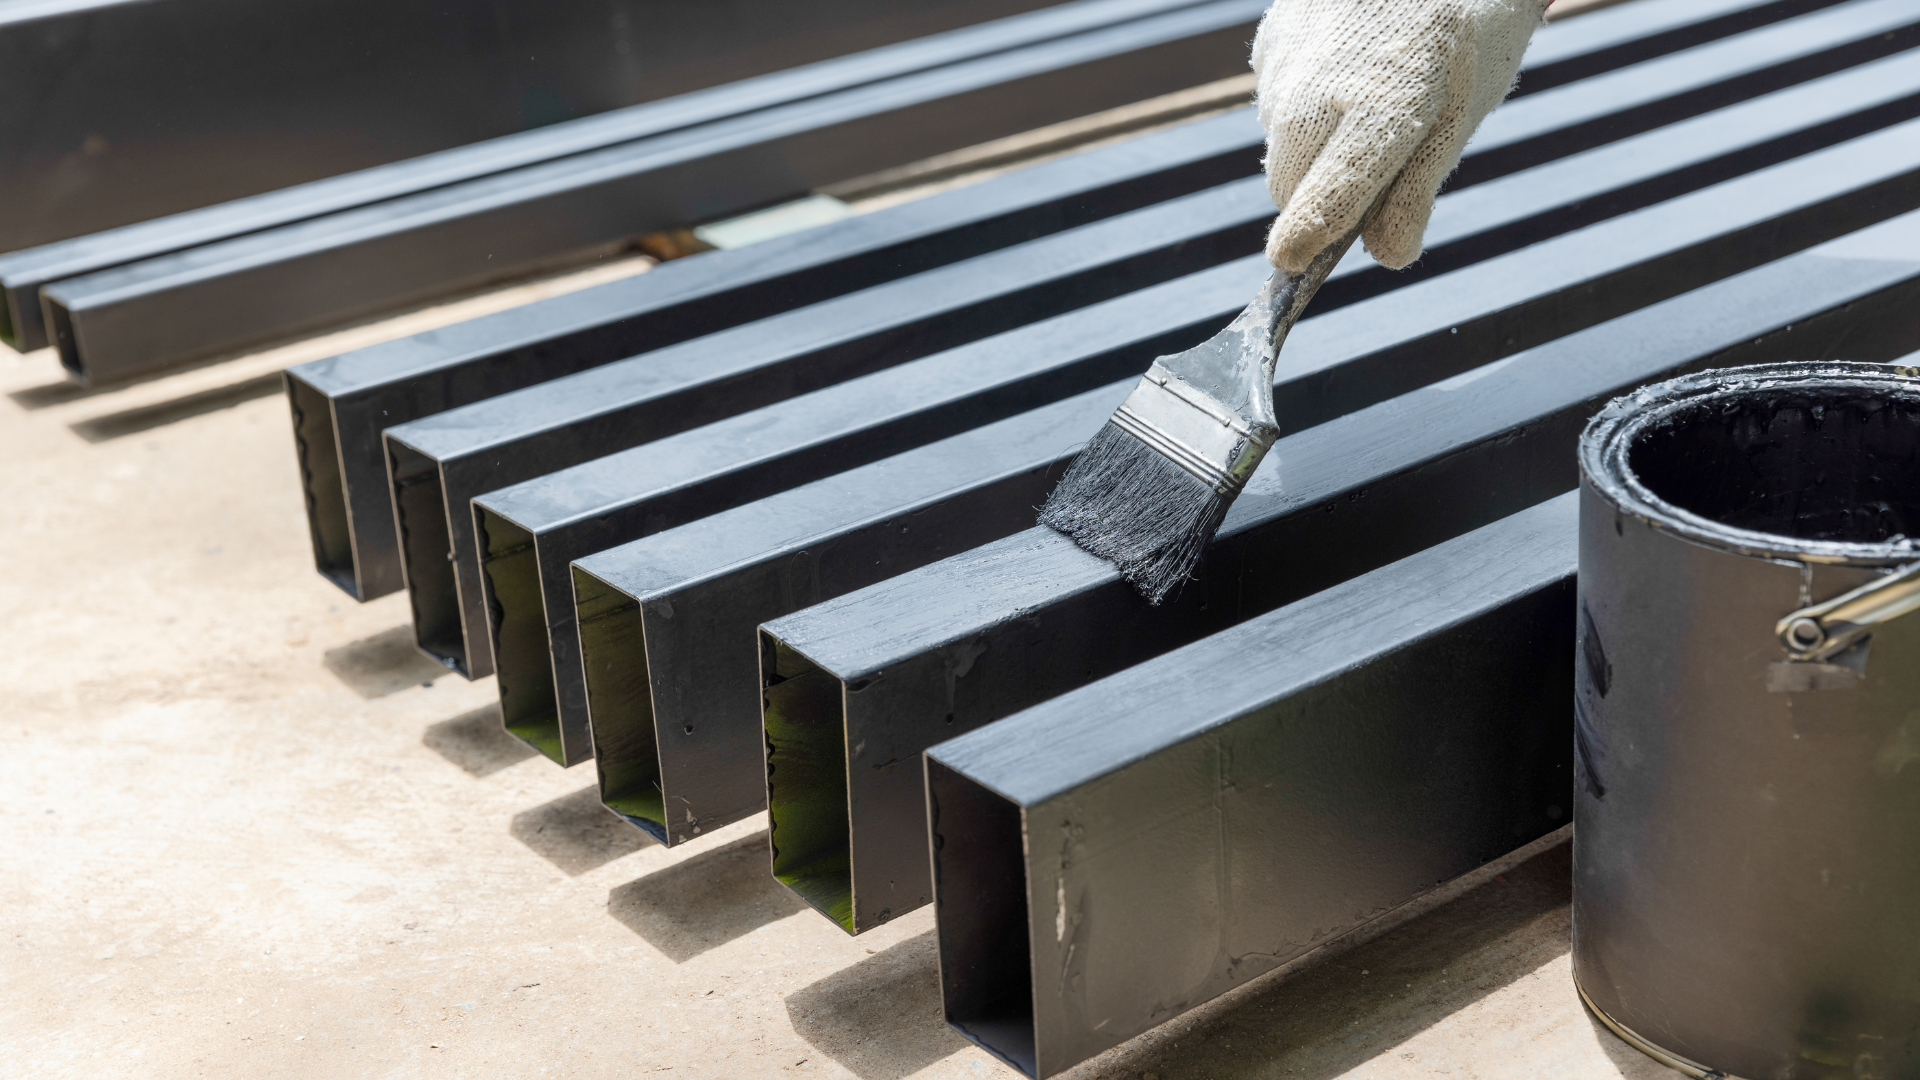
The secret to long-lasting DIY exterior projects in a saltwater environment lies in a three-part strategy: starting with the right materials, mastering surface preparation, and, most importantly, applying a high-quality salt-resistant finish. This article provides a comprehensive guide to fortifying your outdoor projects against the relentless forces of coastal corrosion.
Your DIY Guide to Coastal Protection: 3 Essential Steps
By following these simple steps, you can create durable, beautiful exterior projects that stand up to the salt, sun, and humidity of the Treasure Coast.
Step 1: Start with the Right Materials (Your First Line of Defense)
Before you even think about a finish, your choice of materials is the most critical decision.
Wood: Not all wood is created equal in a coastal climate.
Best Choices: Opt for naturally rot- and insect-resistant woods like cedar, cypress, or marine-grade pressure-treated lumber. These are your best defense against moisture and pests.
Avoid: Steer clear of untreated pine or other softwoods that will quickly warp and rot without extensive maintenance.
Metal: Saltwater is a death sentence for most unprotected metals.
Best Choices: Use stainless steel (Grade 316) for fasteners, hinges, and other hardware. Grade 316 stainless steel contains molybdenum, which makes it far more resistant to corrosion from chlorides (salt) than common Grade 304. For larger projects, aluminum is also a good, rust-proof option.
Avoid: Standard steel, iron, and even galvanized steel will rust over time in a salty environment.
Concrete & Masonry: These surfaces are porous, allowing salt to penetrate and cause spalling and cracking.
Best Choice: Use a high-quality, dense concrete mix and ensure it’s properly cured. Use a sealer specifically designed to repel water and salts.
Step 2: Master Surface Preparation (The Secret to a Lasting Finish)
Even the best salt-resistant paint or sealer will fail if applied to a poorly prepared surface.
Cleanliness is Key: Before any sanding or priming, thoroughly clean the surface. Use a power washer for concrete and a mix of water and a mild detergent for wood. For rusty metal, use a wire brush and rust remover.
Sanding & Smoothing: Sand the surface to ensure proper adhesion. For wood, this removes old finishes and creates a smooth surface. For painted surfaces, light sanding scuffs the existing paint, giving the new finish something to stick to.
Crucial Step for Coastal Humidity: Wait for a dry day. High humidity can trap moisture under your finish, leading to bubbles and premature peeling. For the best results, wait for a day with low humidity and no chance of rain.
Prime Everything: Priming is non-negotiable for coastal projects.
For Wood: Use a high-quality exterior wood primer designed to seal the wood and block tannins from bleeding through the paint.
For Metal: Use a rust-inhibitive primer specifically for metal.
For Concrete: Use a masonry or concrete primer to seal the porous surface before painting.
Step 3: Select and Apply the Best Salt-Resistant Finishes
This is where you lock in your protection. Choose a finish that matches your material and project goals.
For Wood:
Solid Stains & Paints: These are highly durable and offer the best protection against UV rays and moisture. Look for products labeled as marine-grade, acrylic latex, or formulated for coastal environments. These finishes are flexible and resist cracking as the wood expands and contracts.
Water-Repellent Sealers: For a more natural look, a clear water-repellent sealant will protect the wood from moisture damage without hiding the grain. These require reapplication more frequently (every 1-3 years) than a solid stain or paint.
For Metal:
Marine-Grade Paint: After priming, use a marine-grade enamel or epoxy paint. These paints create a hard, impenetrable barrier that seals the metal from saltwater and moisture.
Powder Coating: For smaller metal parts, powder coating is an excellent professional option that provides an extremely durable, rust-proof finish.
For Concrete & Masonry:
Waterproof Sealer: A good concrete or masonry sealer will be your best friend. Look for products that are penetrating and breathable, so they stop water intrusion from the outside but allow moisture vapor to escape from within, preventing blistering.
Exterior Masonry Paint: For a colored finish, use a high-quality, flexible exterior paint designed for masonry, applied after a thorough priming.
Conclusion: Your Projects, Protected from the Sea
DIY projects in a coastal climate present unique challenges, but with the right approach, you can ensure they last for years. By making smart choices from the beginning with marine-grade materials, taking the time for thorough surface preparation, and applying a salt-resistant finish specifically designed for your project, you can confidently build, restore, and maintain your outdoor spaces. Protecting your exterior projects from coastal corrosion isn’t just a chore—it’s a crucial part of living and loving the Treasure Coast lifestyle.