Your waterfront property on the Treasure Coast is a prized possession, and your dock is often the focal point. Whether it’s made of wood, composite, or aluminum, constant exposure to the harsh Florida environment—sun, salt, rain, and marine life—demands regular attention. Neglecting your dock can lead to costly repairs down the line, not to mention a diminished aesthetic appeal.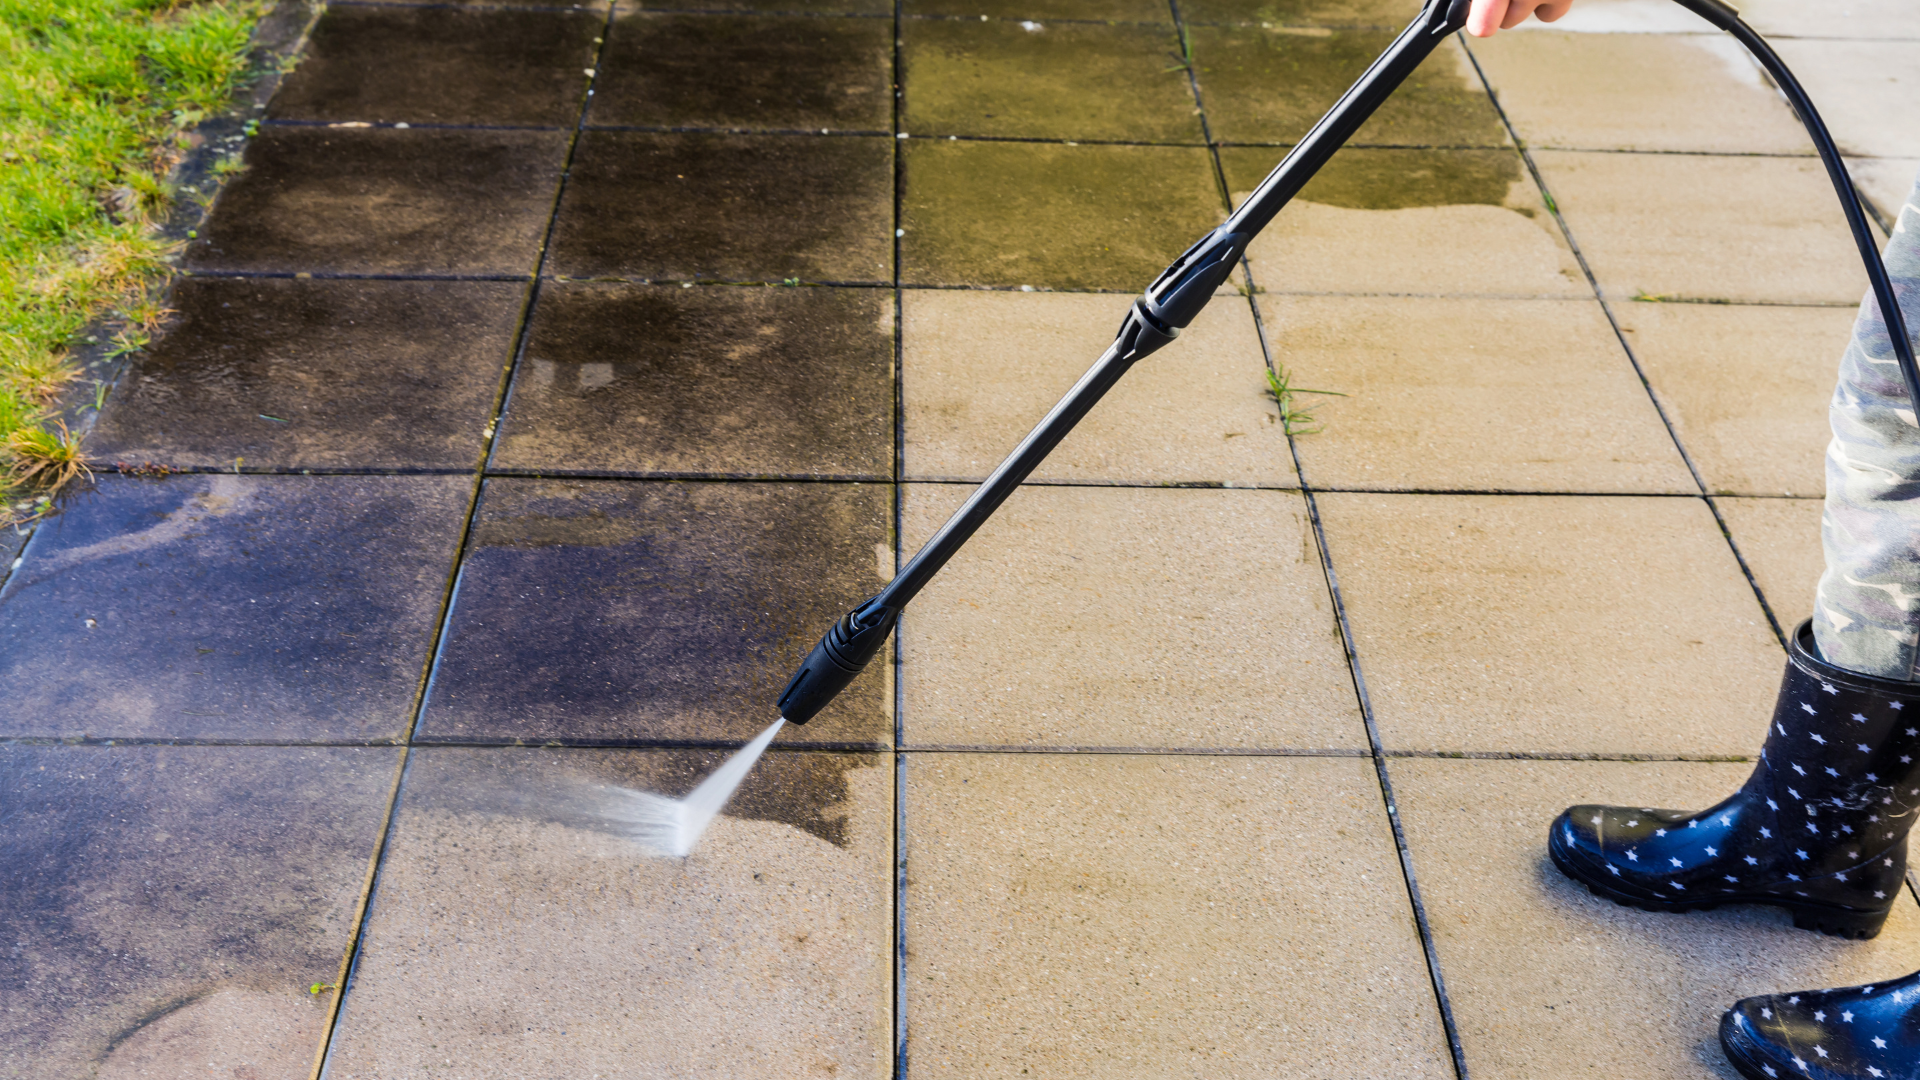
The good news? Many dock maintenance tasks are entirely DIY-friendly. This article provides a comprehensive DIY dock revitalization checklist, guiding Treasure Coast homeowners through the process of pressure washing, sealing, and performing minor repairs to restore and protect their cherished waterfront gem.
Your DIY Dock Revitalization Checklist: 3 Essential Steps
Before you begin, gather your supplies: safety glasses, gloves, non-slip shoes, appropriate cleaning solutions (eco-friendly for marine environments!), a pressure washer (with appropriate nozzles), brushes, dock-specific sealant/stain, wood filler, screws, and a drill.
Step 1: Deep Clean with Pressure Washing (Use Caution!)
Removing built-up grime, algae, mildew, and salt residue is the first crucial step to revitalize your dock. Pressure washing can be highly effective, but must be done with care.
Assess Your Dock Material:
Wood Docks: Use low pressure (1000-1200 PSI max) and a wide-angle (25-40 degree) fan tip. Hold the nozzle at a consistent distance (at least 6-10 inches) and avoid spraying directly against the wood grain or getting too close, as high pressure can splinter or gouge wood.
Composite Docks: Generally lower maintenance, but if pressure washing, use very low pressure and follow manufacturer guidelines to avoid damage to the surface.
Aluminum Docks: Can generally withstand higher pressure, but a mild soap solution and brushing might be sufficient for light cleaning.
Preparation: Clear all items from the dock. Protect any adjacent plants or boat components from overspray.
Eco-Friendly Cleaners: For stubborn stains or mildew, use an eco-friendly, biodegradable dock cleaner specifically designed for marine environments to protect local waterways. Apply, let it dwell, then carefully pressure wash away.
Technique: Work in small sections, moving the wand in smooth, overlapping strokes. Always start with the lowest pressure setting and gradually increase if needed.
Rinse Thoroughly: After cleaning, rinse the entire dock thoroughly with fresh water to remove all cleaning solution and loosened debris. Allow the dock to dry completely (24-48 hours, depending on humidity) before moving to the next step.
Safety First: Wear appropriate Personal Protective Equipment (PPE) including safety glasses, non-slip shoes, and gloves. Be mindful of slip hazards from wet surfaces and cleaning solutions. Never aim the pressure washer at people, pets, or electrical components.
Step 2: Perform Minor Repairs
Once your dock is clean and dry, it’s the ideal time to address any minor issues that could compromise its safety or longevity.
Inspect Thoroughly: Walk the entire length of your dock. Look for:
Loose or Protruding Fasteners: Tighten any loose screws or bolts. Replace rusted or corroded fasteners with marine-grade stainless steel hardware for superior corrosion resistance in saltwater environments.
Splintered or Cracked Boards: For small splinters, carefully sand them down. For minor cracks, use a waterproof wood filler or marine epoxy designed for docks. Apply, smooth, and sand flush once dry. For larger cracks or severely damaged boards, consider replacement.
Wobbly or Sagging Sections: Check the underlying support structure (joists, pilings). For minor issues, reinforcing with additional blocking or brackets might suffice. For significant structural damage, it’s best to consult a professional.
Loose Cleats or Ladders: Ensure all cleats, ladders, and railings are securely fastened. Tighten bolts or reinforce mounting points if necessary.
Sanding: Lightly sand any rough spots or areas where repairs were made to ensure a smooth, splinter-free surface.
Step 3: Seal and Protect (The Key to Longevity!)
Sealing your dock is perhaps the most critical step for long-term protection, especially for wooden docks in a saltwater environment.
Choose the Right Sealer: Opt for a marine-grade wood sealer or stain that is specifically formulated for docks and exposed to saltwater. Look for products that offer:
UV Protection: To prevent sun damage and fading.
Waterproofing: To repel moisture and prevent rot, warping, and cupping.
Mildew/Algae Resistance: To inhibit growth in humid conditions.
Eco-Friendly/Aquatic Safe: Crucial for waterfront properties to protect marine life and water quality. Brands like SEAL-ONCE Marine are good examples.
Application:
Ensure the dock is completely dry before applying.
Apply the sealer evenly with a brush, roller, or pump sprayer. Follow the manufacturer’s instructions regarding application temperature, number of coats, and drying times. Many sealers recommend a second coat while the first is still damp (“wet-on-wet” application).
Pay special attention to end grains and areas where wood meets water, as these are highly vulnerable.
Benefits of Sealing: A proper marine-grade sealer will:
Extend Lifespan: Protects the wood from rot, decay, and environmental damage.
Enhance Appearance: Restores and preserves the natural beauty of the wood, or adds a tint for aesthetic appeal.
Improve Safety: Reduces splintering and can create a less slippery surface when wet.
Reduce Maintenance: Makes future cleaning easier by repelling dirt and grime.
Conclusion: Preserve Your Waterfront Oasis
Your dock is a significant investment and a vital part of your Treasure Coast waterfront lifestyle. By following this DIY dock revitalization checklist – meticulously pressure washing (with caution!), addressing minor repairs, and applying a high-quality marine-grade sealer – you can effectively combat the harsh marine environment. This proactive dock maintenance not only preserves the structural integrity and aesthetic appeal of your waterfront gem but also ensures it remains a safe and enjoyable extension of your home for countless years of Florida living. Dive into these DIY steps and keep your dock thriving!